Bot Template is one of the features of Qiscus Robolabs that makes it easier for businesses to create their own chatbots. By using Bot Templates, you no longer need to create a chatbot from scratch. All you need to do is to choose which template best fits your preferences and simply replace the template on Excel. Here are some steps you will need to follow to use Bot Template:
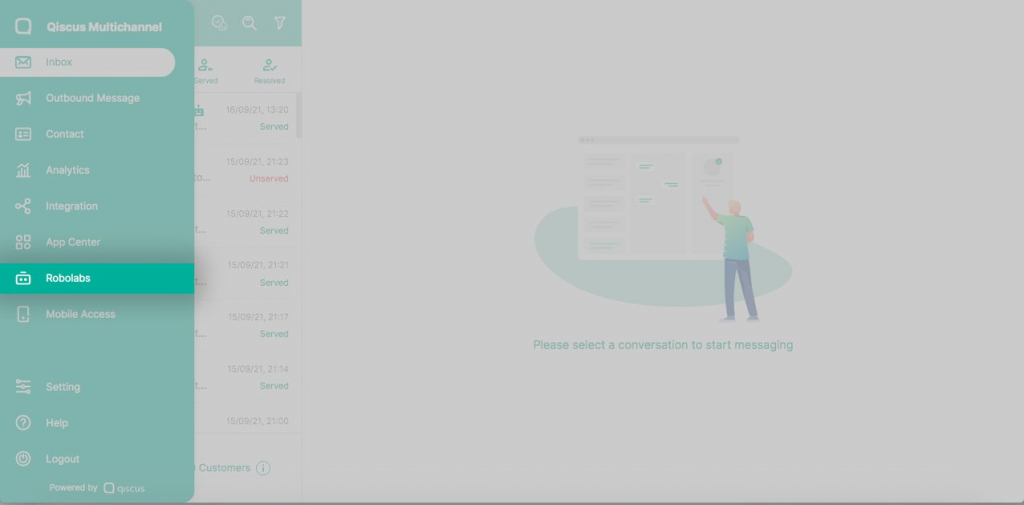
- First, go to the Robolabs page by clicking the Robolabs menu on the sidebar.
2. Next, choose the project name that you will be used.
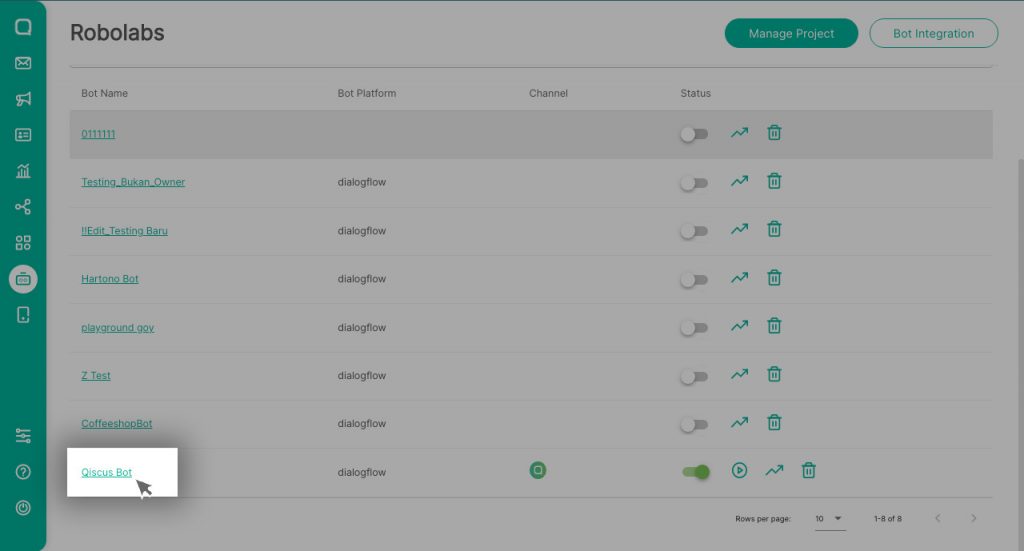
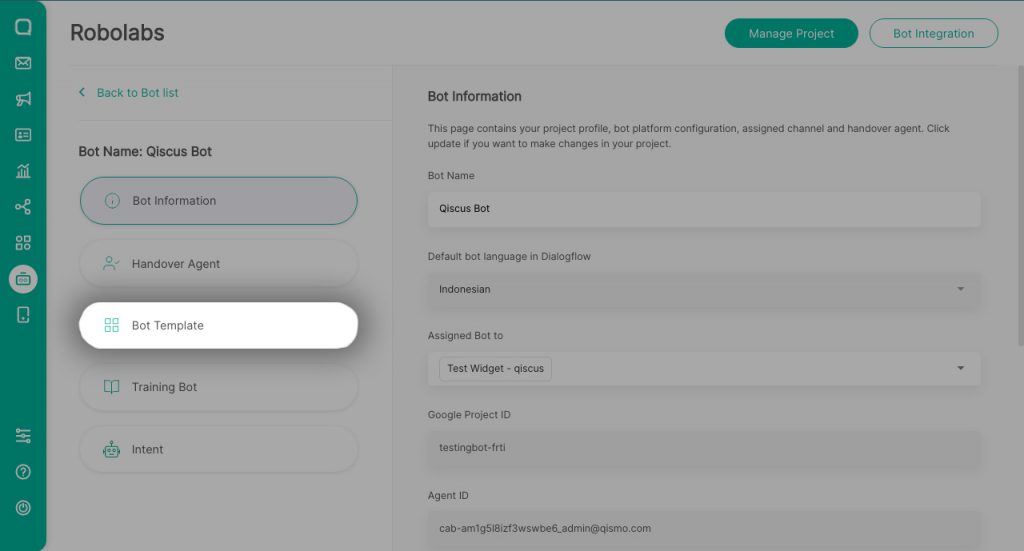
3. After that, select the Bot Template menu on the left
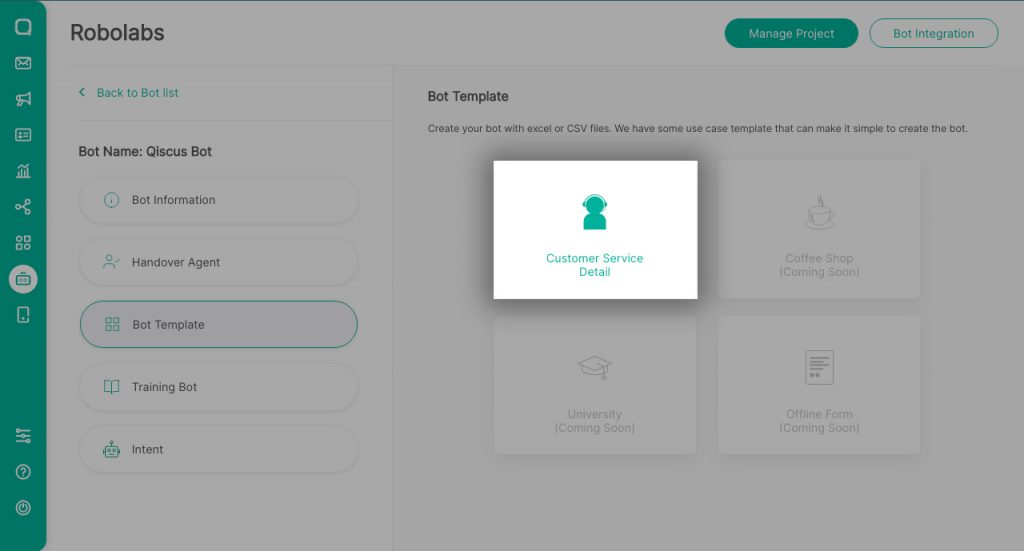
4. There are various templates on the Bot Template page that can be used according to the needs and requirements of your business. For this demonstration, we will use the Customer Service Template to be implemented into the bot project.
5. After arriving at the Customer Service Template page, the final result of your chosen template will be displayed on the WhatsApp mockup. You will be able to see if the final results of the template fits your chatbot the way you want to. There will also be more descriptions of the template.
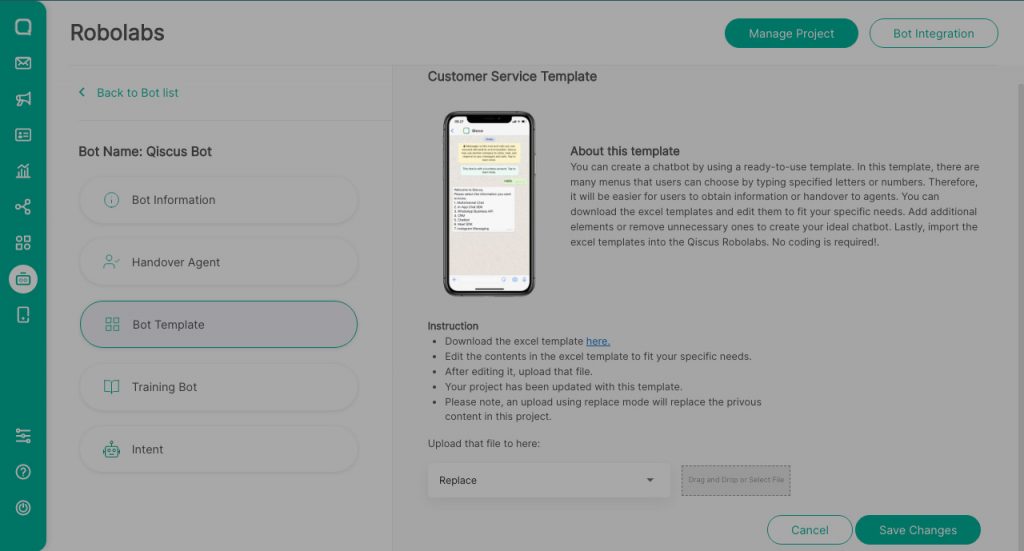
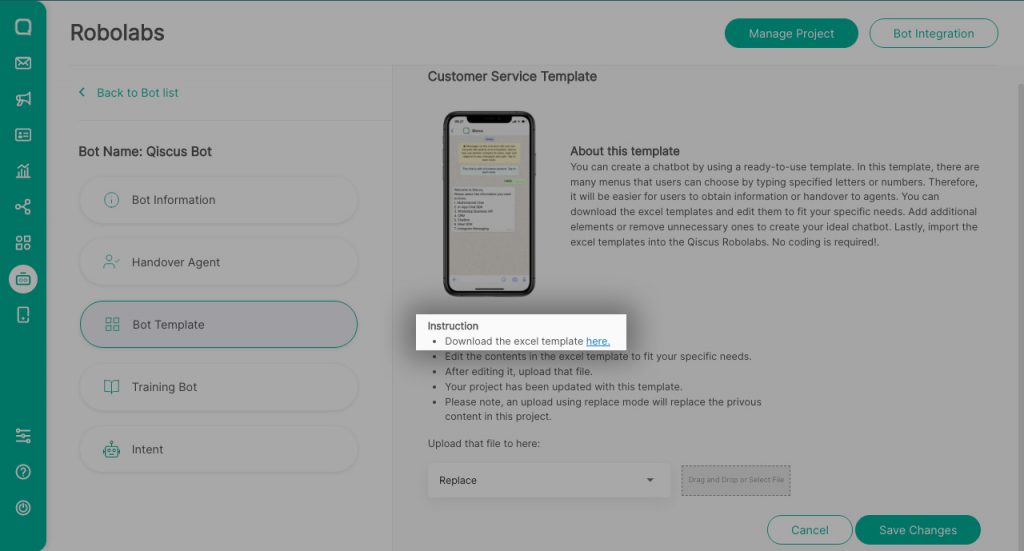
6. Next, follow the instructions by downloading the Excel file by clicking on “Download the excel template here”. The Excel file will be downloaded onto your computer.
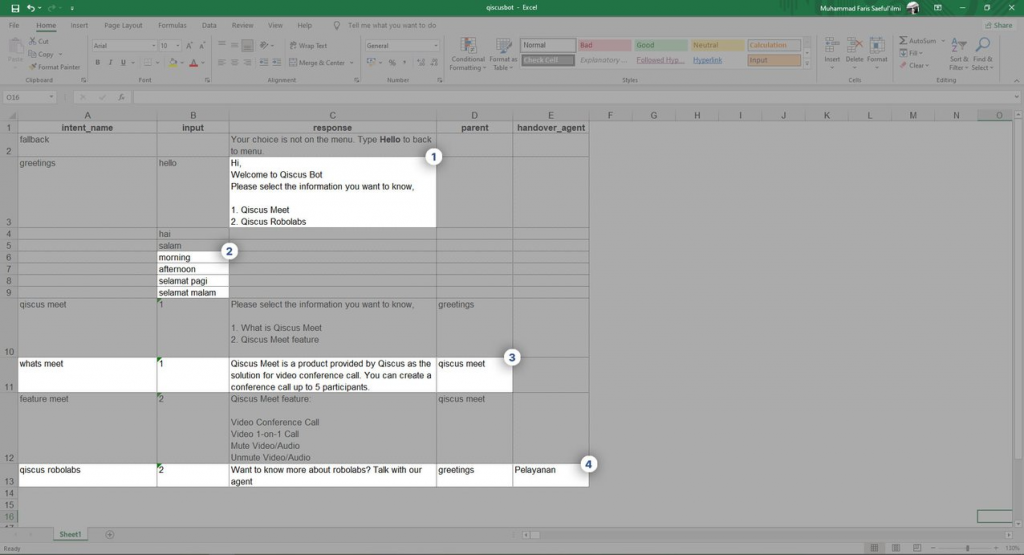
7. After that, open the Excel file using the MS Excel. Then, change the components based on your requirements. The following is a display of the Customer Service Bot Template.
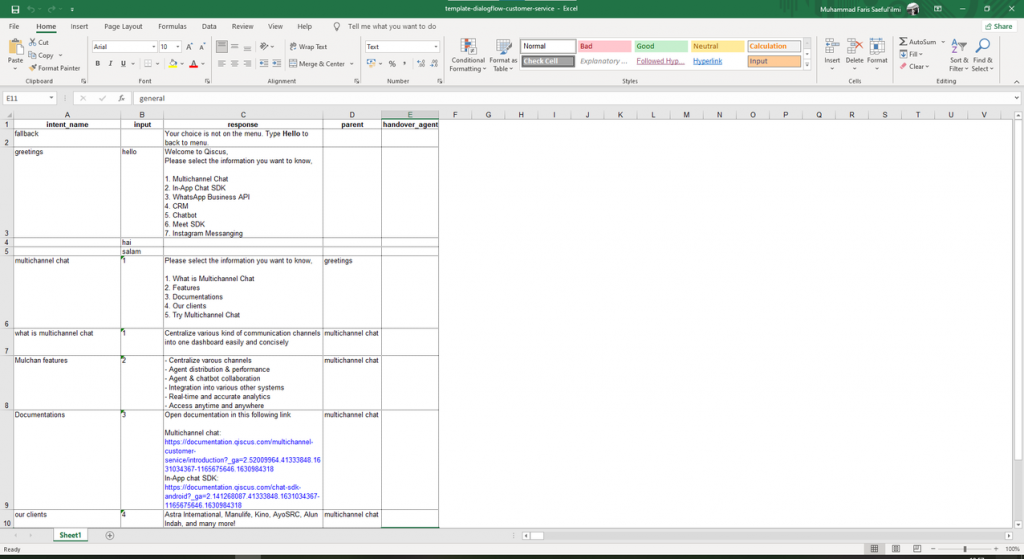
There are several columns on the template that can be adjusted, such as:
- intent_name
Intent is a question mapping that will be asked from the user to the bot. You can categorize these conversations into an intent, where the intent has the input and response you specify. From the template, there are intents that already exist in the Dialogflow project, namely fallback and greetings.- Intent fallback contains a bot response if the sentence is not related to any intent. In the example, the bot will respond “Your choice is not on the menu. Type Hello to go back to menu”. This response will appear if the sentence or message submitted by the user cannot be understood by the bot.
- Intent greetings is a greeting message or response from the bot when the user contacts the business for the first time. For example, if the user types ‘Hello’, ‘Hi’, or ‘Greetings’, then the bot will respond with “Welcome to Qiscus, please select the information you want to know…”
- input
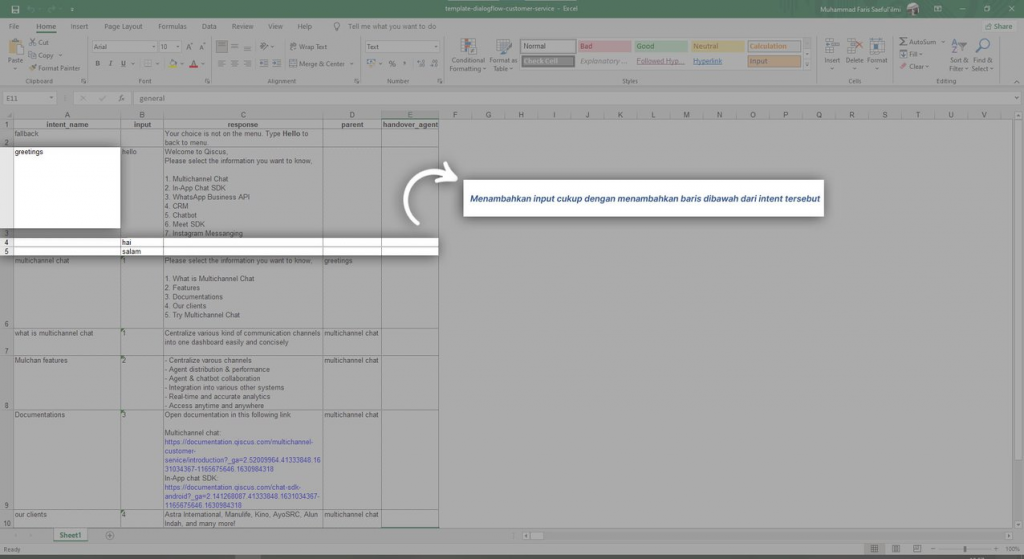
This is an input from the user into the intent. In the example, the intent greeting will respond when the user types ‘Hello’. “Hi” and other greetings will also be the input of intent greetings, so if you want to input the ‘input’ more than once, you just need to add a line below the intent.
- response
Response is the answer from the bot in the intent. For example, if the user says “Hello” then the sentence will be entered in the intent greeting with the answer from the bot shown below:
Welcome to Qiscus,
Please select the information you want to know:
1. Multichannel Chat
2. In-App Chat SDK
3. WhatsApp Business API
4. CRM
5. Chatbot
6. Meet SDK
7. Instagram Messanging
- parent
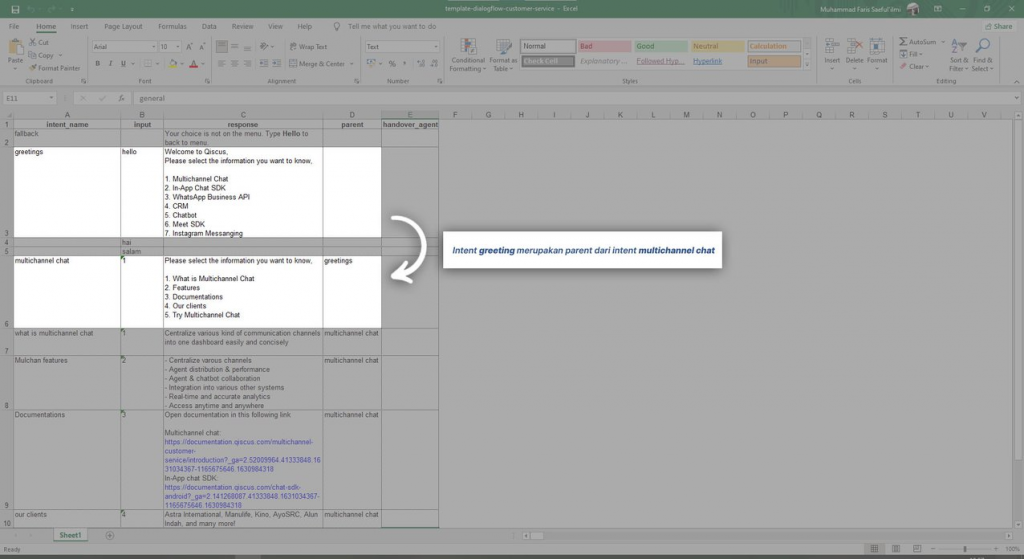
The parent has a function to know if the intent has a parent from that particular intent or not. For example, the multichannel chat intent is located on the greetings menu. Every user who enters the Multichannel Chat menu must enter greetings first before entering the Multichannel Chat menu. Hence, the parent of the Multichannel Chat intent is greetings.
- handover_agent
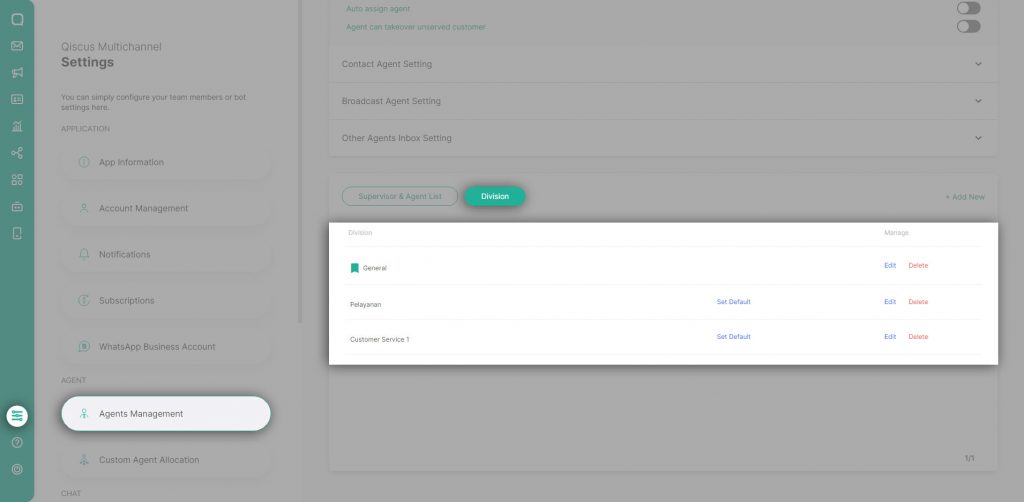
If the intent will be forwarded to specific agents, then you can fill the agent here. You will need to write the division of your Qiscus Multichannel Chat account in this column, but make sure that the division you want to use matches the division on your Multichannel account. You can find information on Division by following this step: Multichannel Chat > Setting > Agents Management > Division
- With the component explanation on the Bot Template, you can directly make some changes in the template based on your preferred requirements. For example, we will change some responses and input of the intent and another intent, then Save the Excel file and rename it with “qiscus-bot.xls”
In the example above, there are some changes made as needed, which include:
- The response that has been changed as needed with 2 menu options on the intent greetings, namely Qiscus Meet and Qiscus Robolabs.
- An input in the intent greetings had been added. Simply add a new row in Excel, then enter the required input.
- The change of parent on the whats meet intent. Because the whats meet intent is on the intent Qiscus meet menu, the parent of the whats meet intent is the Qisucs meet intent.
- The handover agent in the Qiscus robolabs intent was added. So if the user enters the Qiscus robolabs intent, the bot will respond based on the respond and directly forward the conversation to the agent in the Service division. This division should match the Division of the agent on the Multichannel account.
After that, you can save the file and upload the template to Robolabs again.
Uploading Bot Templates Onto Qiscus Robolabs
Firstly, you will need to upload the template to Robolabs once you have saved the file. Afterwards, you will need to upload the template file, which is the Customer Service Template, by choosing the file.
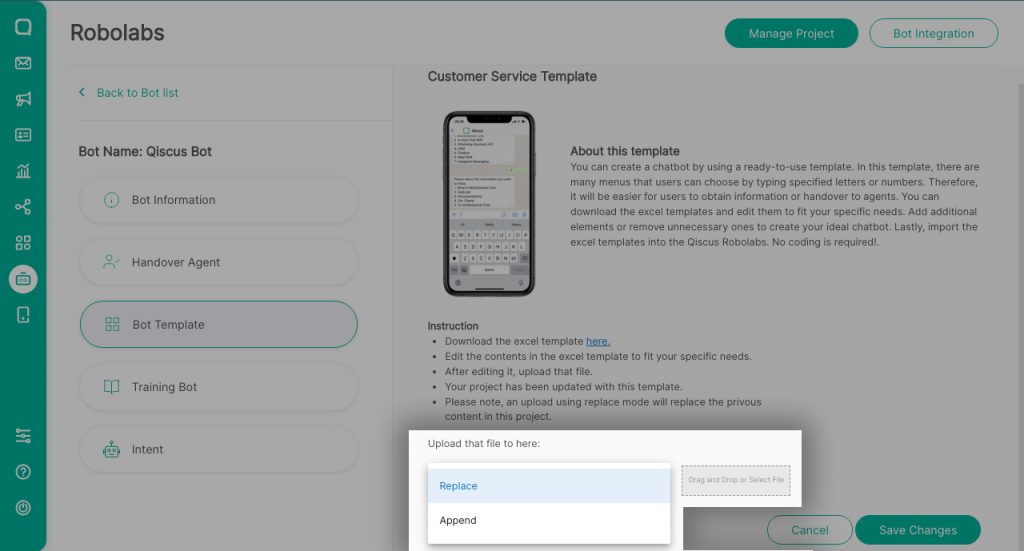
There are 2 upload mechanisms on Robolabs to upload the template, namely Replace and Append
- Replace is used to replace all the project bot components on the project bot with the template to be uploaded.
- Append is used to add some modified bot components in Excel without changing the entire flow that already exists in the bot project
If you are using the Bot Template for the first time, we suggest that you use the Replace mechanism. Then, if you want to add another components in Excel after uploading the template, you can then use the Append mechanism by inputing the intent, input, and response to be added.
The following is an example of how you can add a new intent by using the Append mechanism without changing the entire flow:
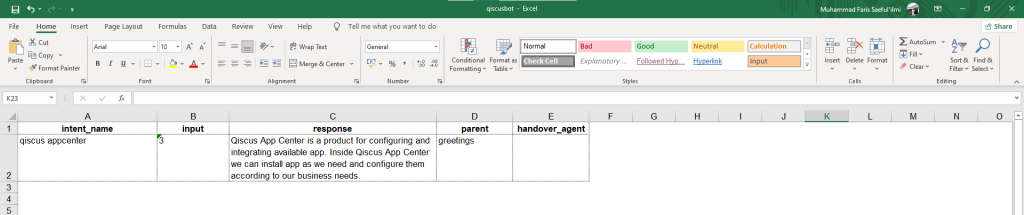
From the example above, you can simply upload the Excel template by adding the Qiscus appcenter intent along with the input, response, and parent of the intent without changing the existing project bot.
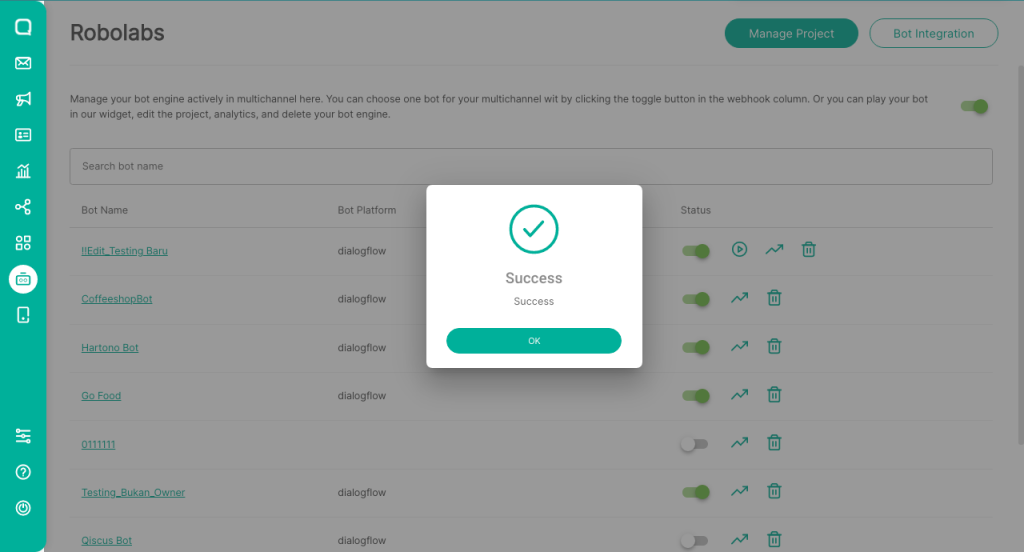
Afterwards, click Save Changes to upload the template.
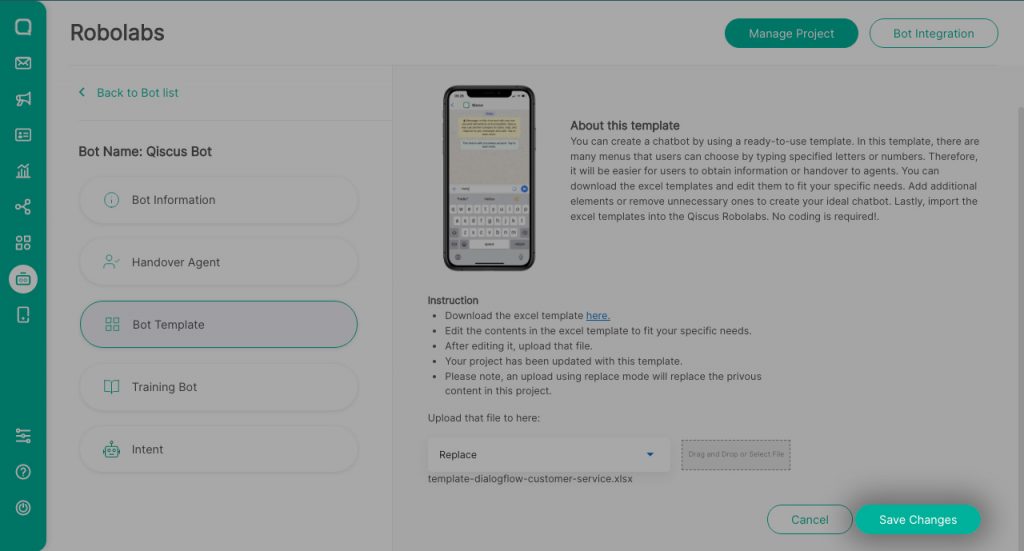
Congratulations! The bot template that you have uploaded will now be implemented in your project bot.
If you face any difficulties or questions regarding Bot Templates or other features on Qiscus Robolabs, don’t hesitate to contact us by clicking on this Support Qiscus here.