In this tutorial, we’ll try to create a WhatsApp-like web-app using Qiscus web chat SDK. We focus mainly on the user interface. More functionality will be discussed in another tutorial.
Pre-requisite
Before we can start working, we need to prepare necessary files for this tutorial. They are qiscus SDK javascript file and CSS file. We also need fontawesome CSS and emoji library (optional). All of this files can be acquired through CDN. Or you can easily copy and paste code this code snippet.
<html lang="en">
<head>
  <meta charset="UTF-8">
  <title>Documenttitle>
  <link rel=stylesheet href=https://maxcdn.bootstrapcdn.com/font-awesome/4.6.3/css/font-awesome.min.css>
  <link rel="stylesheet" type="text/css" href="https://s3-ap-southeast-1.amazonaws.com/qiscus-sdk/web/v2.4.0/css/qiscus-sdk.2.4.0.css">

  <script src="https://cdnjs.cloudflare.com/ajax/libs/emojione/2.2.7/lib/js/emojione.min.js"></script>
head>
<body>
  <div id="qiscus-widget">div>
  <script src="https://s3-ap-southeast-1.amazonaws.com/qiscus-sdk/web/v2.4.0/js/qiscus-sdk.2.4.0.js"></script>
  <script>
     // let's setup options for our widget
     QiscusSDK.core.init({
        AppId: 'DRAGONGO',
        options: {
          // When we're success login into qiscus SDK we'll have a 1-on-1 chat to [email protected]
          // You can change this to any user you have on your AppId, e.g: contact@your_company.com, etc
          loginSuccessCallback(data) { QiscusSDK.core.UI.chatTarget('[email protected]') },
          // function below will be called when there's new message
          newMessagesCallback(data) { console.log("new message : ", data) }
        }
     });
     // login to qiscus
     QiscusSDK.core.setUser('[email protected]', 'password', 'Qiscus Demo');
     // render the widget
     QiscusSDK.render();
  </script>
body>
html>
Also read: “Qiscus Chat SDK Identity Management“
Save that code snippet in a file named index.html. Start a web server and access the file. If you have php installed, you can run php -S localhost:3000 -t . from your command line. If you do it correctly, this is what we’ll see if you navigate to localhost:3000
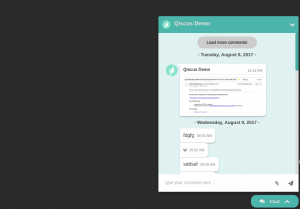
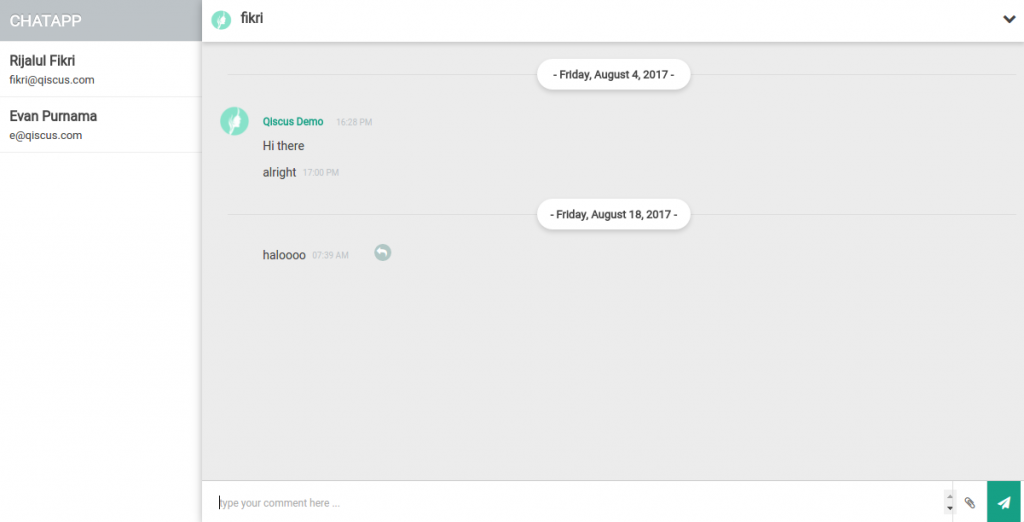
As we can see by the default Qiscus web chat SDK user interface is in the form of a widget. We’re trying to make it look more WhatsApp like. This is what we’re going to create.
Setting up basic layout
We need to modify our HTML a bit to add the sidebar part which hold our contacts list. Modify the body of your HTML into this.
Styling the Layout
Now that we have our contacts list, we need to style it accordingly. First we need to add some quick and dirty reset css to reset all browsers’ default styling. CSS code in this tutorial is using LessCss preprocessor so that we can have that `nested css` feature. If you want to use only css, you need to add parent selector for the nested component.
@import url('https://fonts.googleapis.com/css?family=Roboto');
*, *:before, *:after {
  box-sizing: border-box;
  margin: 0;
  padding: 0;
}
On the code above, we add Roboto web font from Google. You can use any font you like from Google Web Font. Then below it we reset all margin and padding to 0, we also set the box-sizing property so that the calculation of width and height of html element behave nicely (if we don’t set this, the width of the element is the width itself + margin + padding + border).
Styling web chat widget
Now, let’s style the page. Add this below the reset css part. I’ll add necessary comment in it for you to grasp what’s the css is for.
// Make this a full width and height app, and remove any scrollbar that might appear
html, body {
  background: #2b2b2b;
  width: 100%;
  height: 100%;
  overflow: hidden;
}
body {
  padding-top: 15px;
  font-family: 'roboto', sans-serif;
  color: #444;
}
// We're using flexbox for the layout, you can also use `float` if you want
// By default by using `display: flex` will make our content align horizontally
#container {
  width: 100%;
  height: 100%;
  overflow: hidden;
  display: flex;
  flex-grow: 1;
  flex-shrink: 1;
}
.sidebar {
  width: 20%;
  background: #FFF;
  h3 {
    line-height: 2.65em;
    padding: 0 15px;
    background: #bdc3c7;
    color: #FFF;
    text-transform: uppercase;
    text-shadow: 0 -1px 0 rgba(0,0,0,.3);
  }
  ul {
    list-style: none;
    border-top: 1px solid #eee;
  }
  li {
    padding: 10px 15px;
    border-bottom: 1px solid #eee;
    cursor: pointer;
    &:hover {
      background: rgba(0,0,0,.1);
    }
  }
  strong, small {
    display: block;
    line-height: 1.5em;
  }
}
.chat-widget { width: 80%; height: 100%; }
The page now looks like this
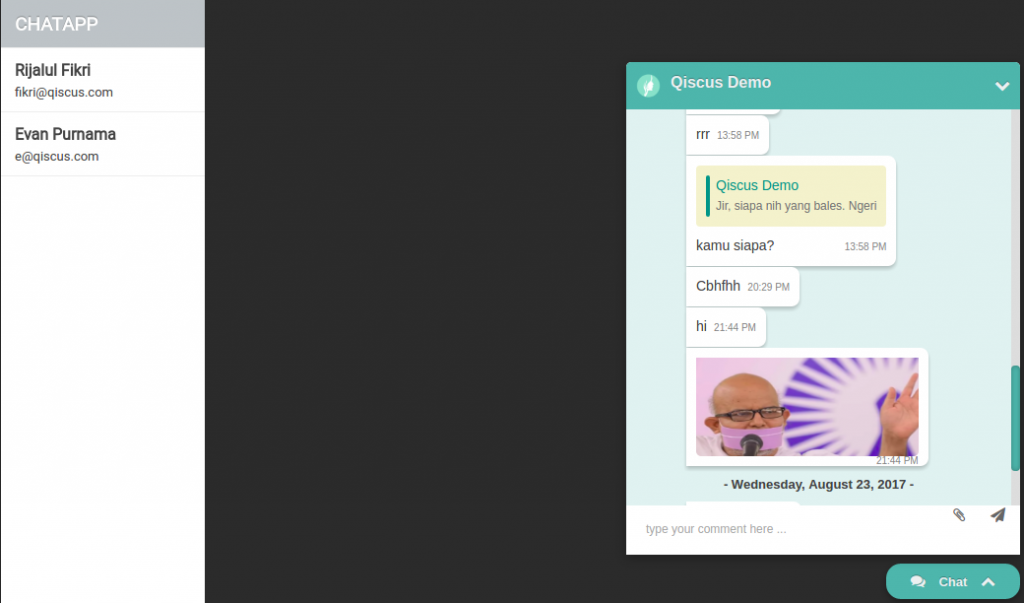
This time we need to change the look of qiscus web chat widget. Add this css at the end of our css file before. I’ll also add comments explaining what the css do.
/* widget */
.qcw-container {
  // make it boxy (no rounded corner)
  border-radius: 0;
  font-family: 'roboto';
}
/*
- Change header background colour to white
- remove shadow
*/
.qcw-header {
  border-radius: 0;
  background: #FFF;
  color: #444;
  box-shadow: 0 3px 7px rgba(0,0,0,.15);
  text-shadow: none;
}
ul#messages__comments {
  background: #ececec;
  text-align: left;
  /* Remove the padding of the first comment of current user */
  .comment--parent .qcw-comment__message {
    padding-bottom: 0;
  }
  /* Remove Chat bubble, we want a simpler looks */
  .qcw-comment__message {
    background: none;
    box-shadow: none;
    &:after {
      border: 0;
    }
  }
}
/* make the username and time close together */
.qcw-comment__info {
  display: flex;
  justify-content: flex-start;
  align-items: baseline;
  border: 0;
}
/* change username and time color */
.qcw-comment__username {
  color: #16a085;
  margin-right: 15px;
}
.qcw-comment__time {
  color: #bdc3c7;
}
/* Change the styling of date separator */
/* We're using :after and :before pseud9 element to add horizontal line and box background beneath the date */
.qcw-comment-date {
  padding: 10px;
  position: relative;
  z-index: 1;
  color: #444;
  &:after {
    content: '';
    height: 100%;
    position: absolute;
    width: 180px;
    background: #FFF;
    border-radius: 50px;
    top: 0;
    /* Using left: 50% then we translateX(-50%) will do the trick of centering and absolutely positioned element */
    left: 50%;
    transform: translateX(-50%);
    z-index: -1;
    box-shadow: 0 3px 7px rgba(0,0,0,.15);
  }
  &:before {
    content: '';
    width: 100%;
    height: 1px;
    background: #ddd;
    position: absolute;
    top: 50%;
    left: 10px;
    z-index: -2
  }
}
/* Textarea */
.qcw-comment-form {
  border-top: 1px solid #ccc;
}
.qcw-form-actions {
  top: 0;
  height: 100%;
  overflow: hidden;
  li {
    border-left: 1px solid #ddd;
    border-radius: 0;
    height: 100%;
    margin: 0;
    float: left;
    width: 40px;
  }
  /* target 2nd child of list item */
  li:nth-child(2) {
    background: #16a085;
    color: #FFF;
    i {
      color: #FFF;
    }
  }
}
Now our web chat app is complete. You can also check the final product here https://playcode.io/qiscussdksample?tabs=style.less&output.