As Qiscus promised on TechTalk #95 before, here’s a written version of what we discussed on that TechTalk. We will not go into detail why we chose Vuejs or Firebase for this project because this tutorial will be too long to read by then. Basically, we’re using both of them because of the ease of use and simplicity. During the TechTalk we’re building a real-time guestbook app where user can post their name and URL live on our web-app.
Requirement vuejs
- Nodejs
- Vue-Cli package. If you already have npm installed you can just typeÂ
npm i -g vue-cli - Firebase library
- Vue-Fire package (vuejs firebase binding library)
Getting Started
- We’ll be using
vuejs webpack boilerplate template.
To do this we need to openterminal then typevue init webpack vuefirebase-projectThis will only work if you already have
vue-cli installed on your machine - now go inside the project folder by typing
cd vuefirebase-project - install all the dependencies by typing
npm install - don’t forget to install firebase and vuefire because the boilerplate doesn’t have them by default. Type
npm install firebase vuefire -S - start the development server by typing
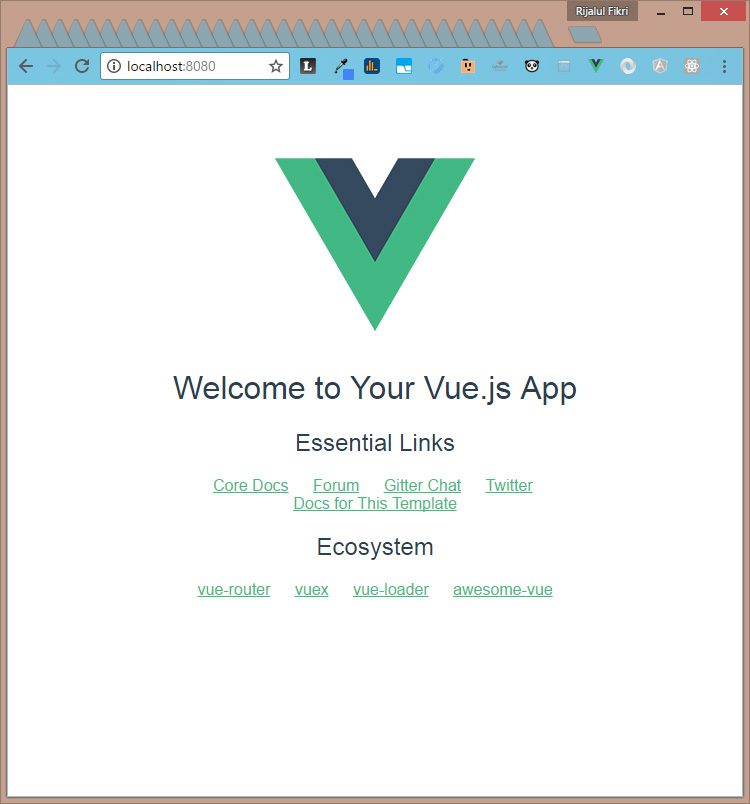
npm run dev. Now open your browser and navigate tolocalhost:8080 - if all goes well you’ll see this screen
- To make styling easier we’ll be using
bootstrapcss cdn on our template. Simply open ./index.html and put this line `` inside theheader tag - Navigate to
src/main.js then importvuefire and tell vuejs to use it// ./src/main.js import Vue from 'vue' import VueFire from 'vuefire' import App from './App'Vue.config.productionTip = false Vue.use(VueFire) . . .
- Navigate to
src/App.vue
- Let’s start by connecting our app to firebase through javascript.
- Navigate to
firebase consoleand get our configuration. The code in thescript section should look like this by now.
 We take the configuration from fire base, then we initialize it. We’re also targeting the
 guests node on our firebase database.
Also read: “The Digital Revolution of Insurance in Indonesia“
VueFireplugin that we use onmain.js file give us property offirebase which will bind ourguests model with theguests node on our firebase database. Now everytime you make changes through firebase console it’ll be reflected directly on our app.- Let’s build the template for displaying our real-time data.
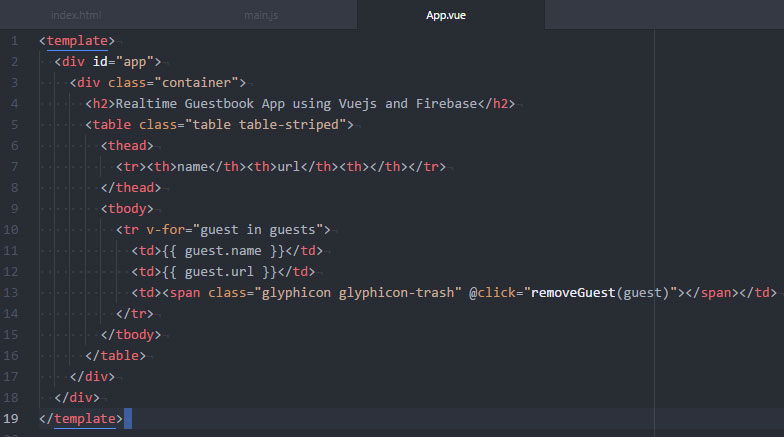
- In the template above we’re using
v-for directive ofvuejs to loop through our firebase database on guests node and display it in our table row. - The double curly braces is used to render our model on each cell of the row.
- Notice how we put
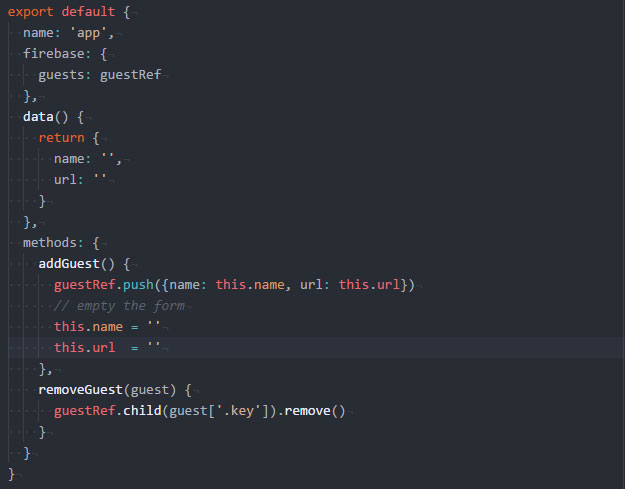
@click event on the third cell. The@clickÂdirective add aclick event listener to our delete button, when it is clicked, it will call the method ofremoveGuest with theparameterof currentguest - Now we need to add that method onto our
script section. Just put this code snippet below thefirebase property.... methods: { removeGuest(guest) { guestRef.child(guest['.key']).remove() } } ... - The code snippet above will remove
guest based on its unique key (seeguest['.key']) - Now let’s add a form to add new guest, go back to the
template section and add this form
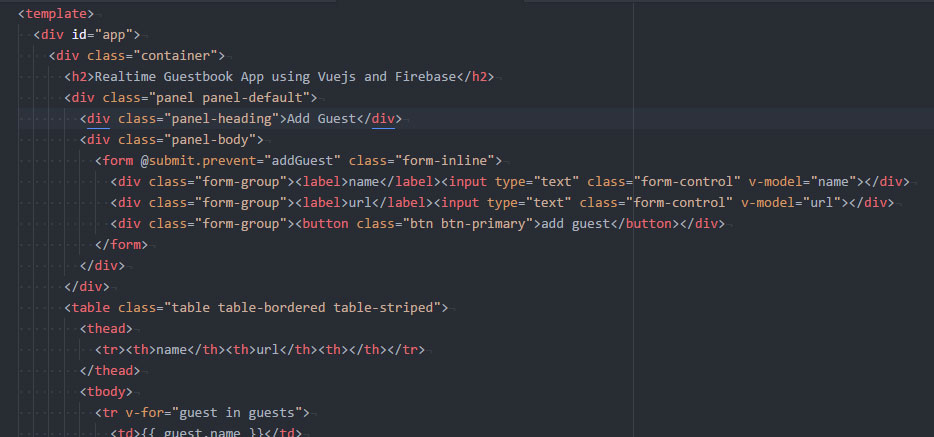
- As we can see from the template above, we bind two more models namely
name andurl. We need to let vuejs know that we’re using those two model. And we also need to add method ofaddGuest. So far, ourscript section will look like this.
- With that concludes our tutorial. Feel free to comment below if you have any problem implementing any step in this tutorial.
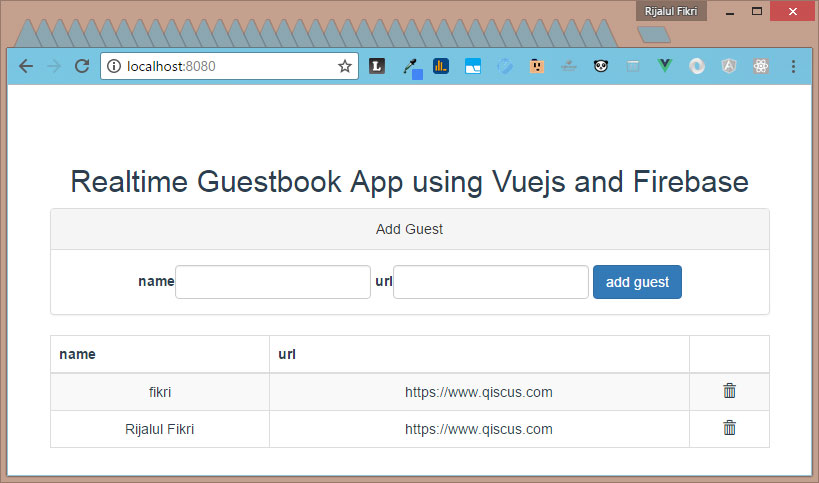
- Here’s the final product: