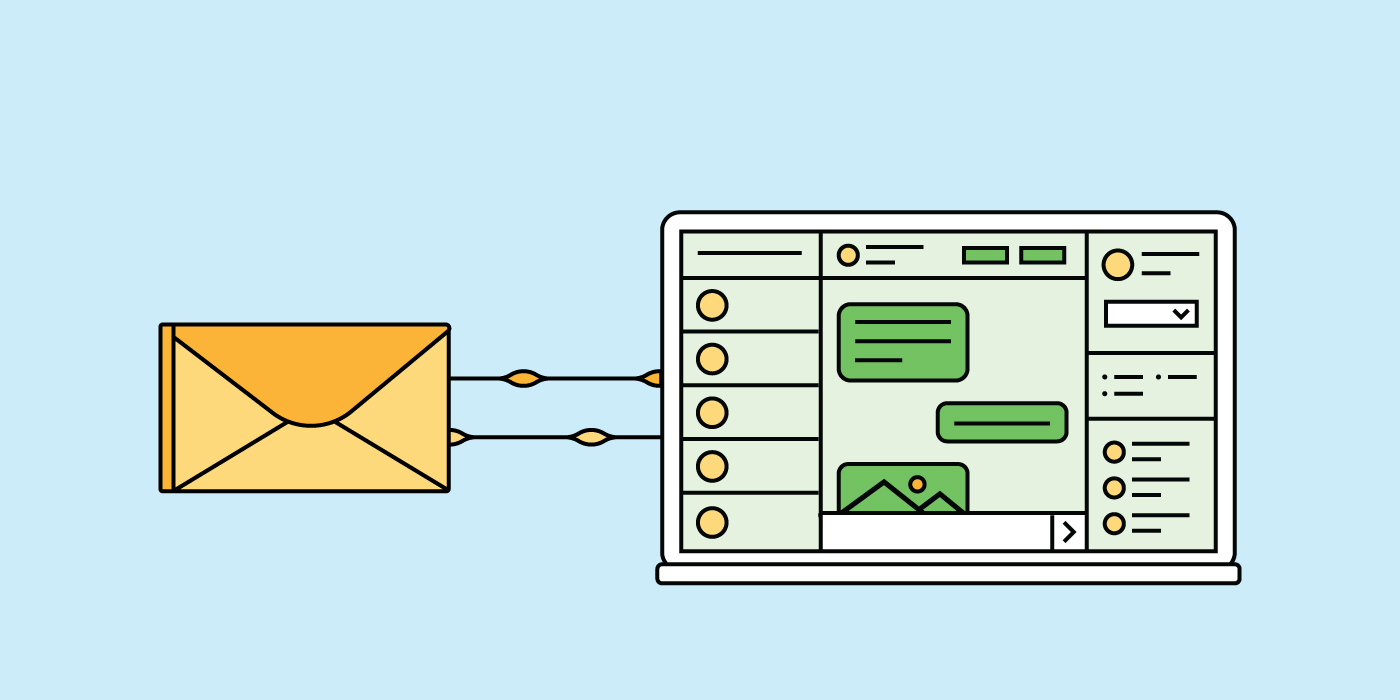
In our previous article, we talked about how we can integrate Twitter DM into Qiscus Multichannel using custom channel. In this article, we will show you how we can integrate Email into Qiscus Multichannel as an additional incoming channel using the Custom Channel Intermediary (CCI) service from Qiscus. CCI is an intermediary service which can help in integrating non-default channels into Qiscus Multichannel. In order to utilise this service, you need to own a Qiscus Multichannel account since it uses the same credentials to connect with the Qiscus Multichannel API services.
Let’s begin by integrating email into Qiscus Multichannel. In this article, we are using Gmail as our email account provider. In general, we use a forwarding service from Gmail to do the job. Hence, we need to make our Gmail and Qiscus Multichannel accounts ready.
Connecting to Multichannel
CCI Dashboard
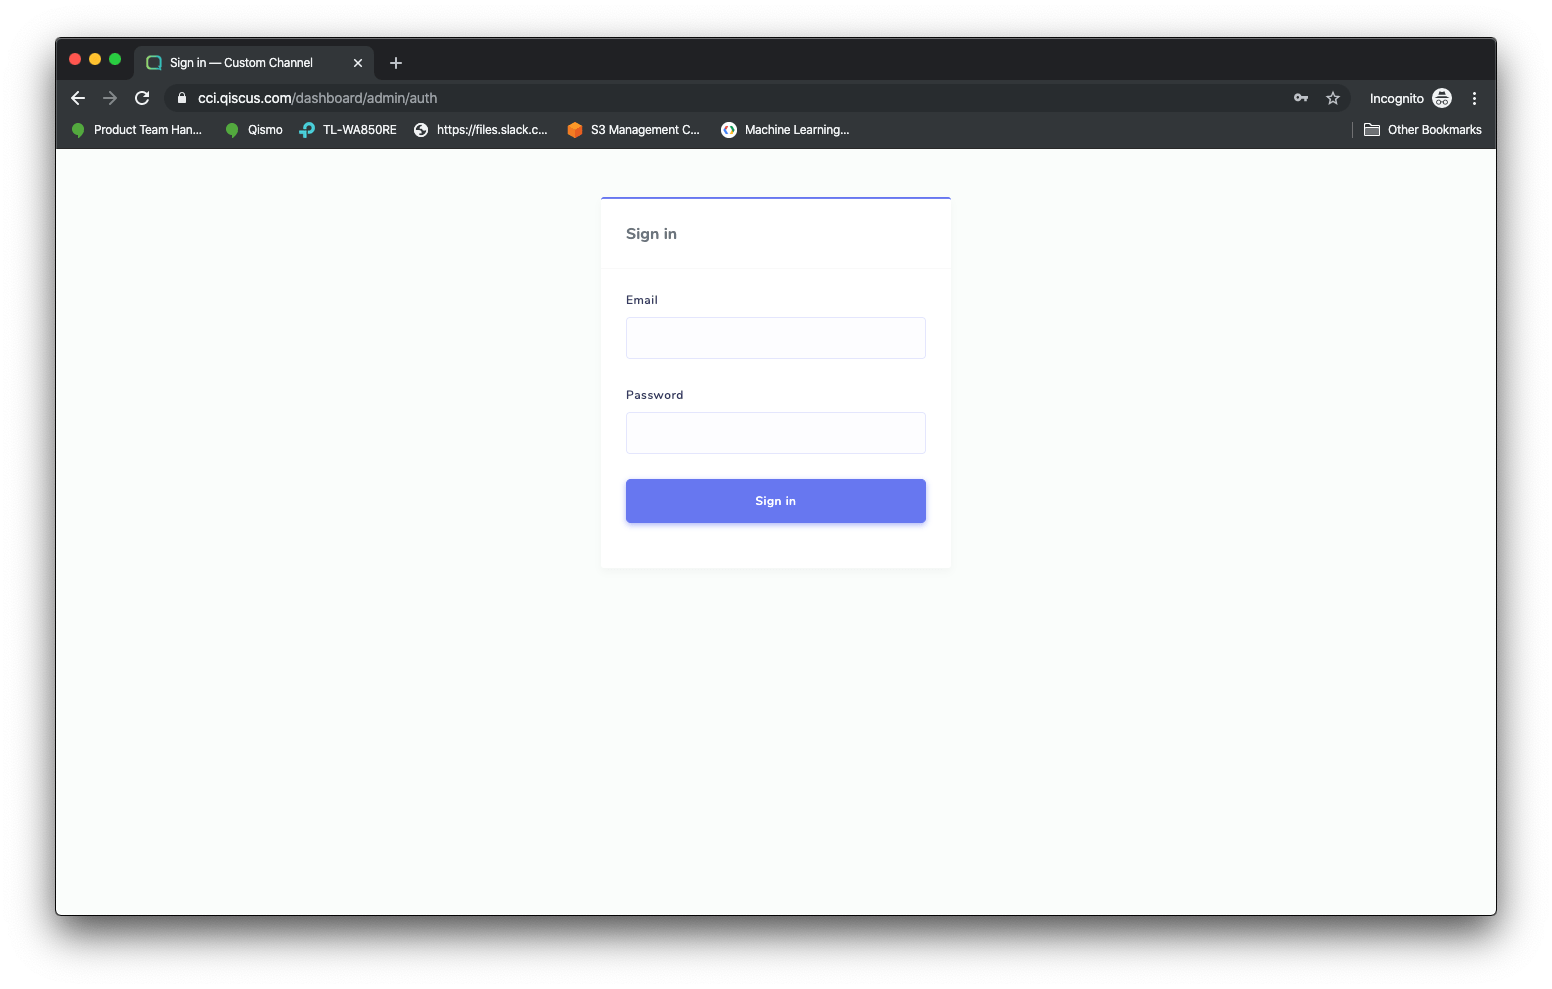
Let’s connect to Multichannel. Go to https://cci.qiscus.com and provide your Qiscus Multichannel account credentials.
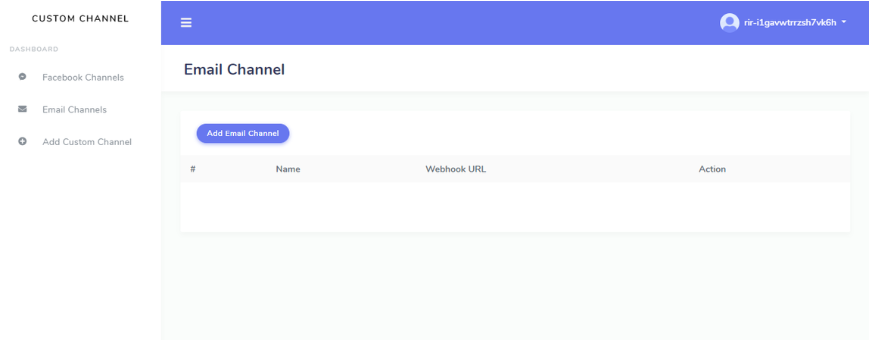
As soon as we are logged in, we will be served with the dashboard depicted below. At the moment, CCI only supports Facebook and Email Channels. However, we can connect more than one account for both of them.

To connect your Gmail account to Multichannel, please click Email Channels > Add Email Channel.
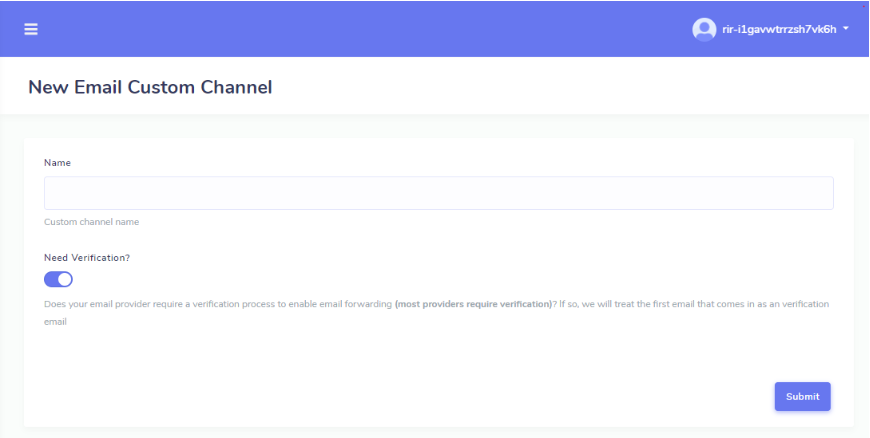
We need to provide a custom channel name in the form. In this example, we use “My Gmail“ as the custom channel. You could provide any name of your choice for this channel name.
Since we are using Gmail/G-Suite, toggle the “Need Verification?” option. Otherwise, you will need to check if your email provider requires verification in order to forward incoming email. Then, click “Submit”.
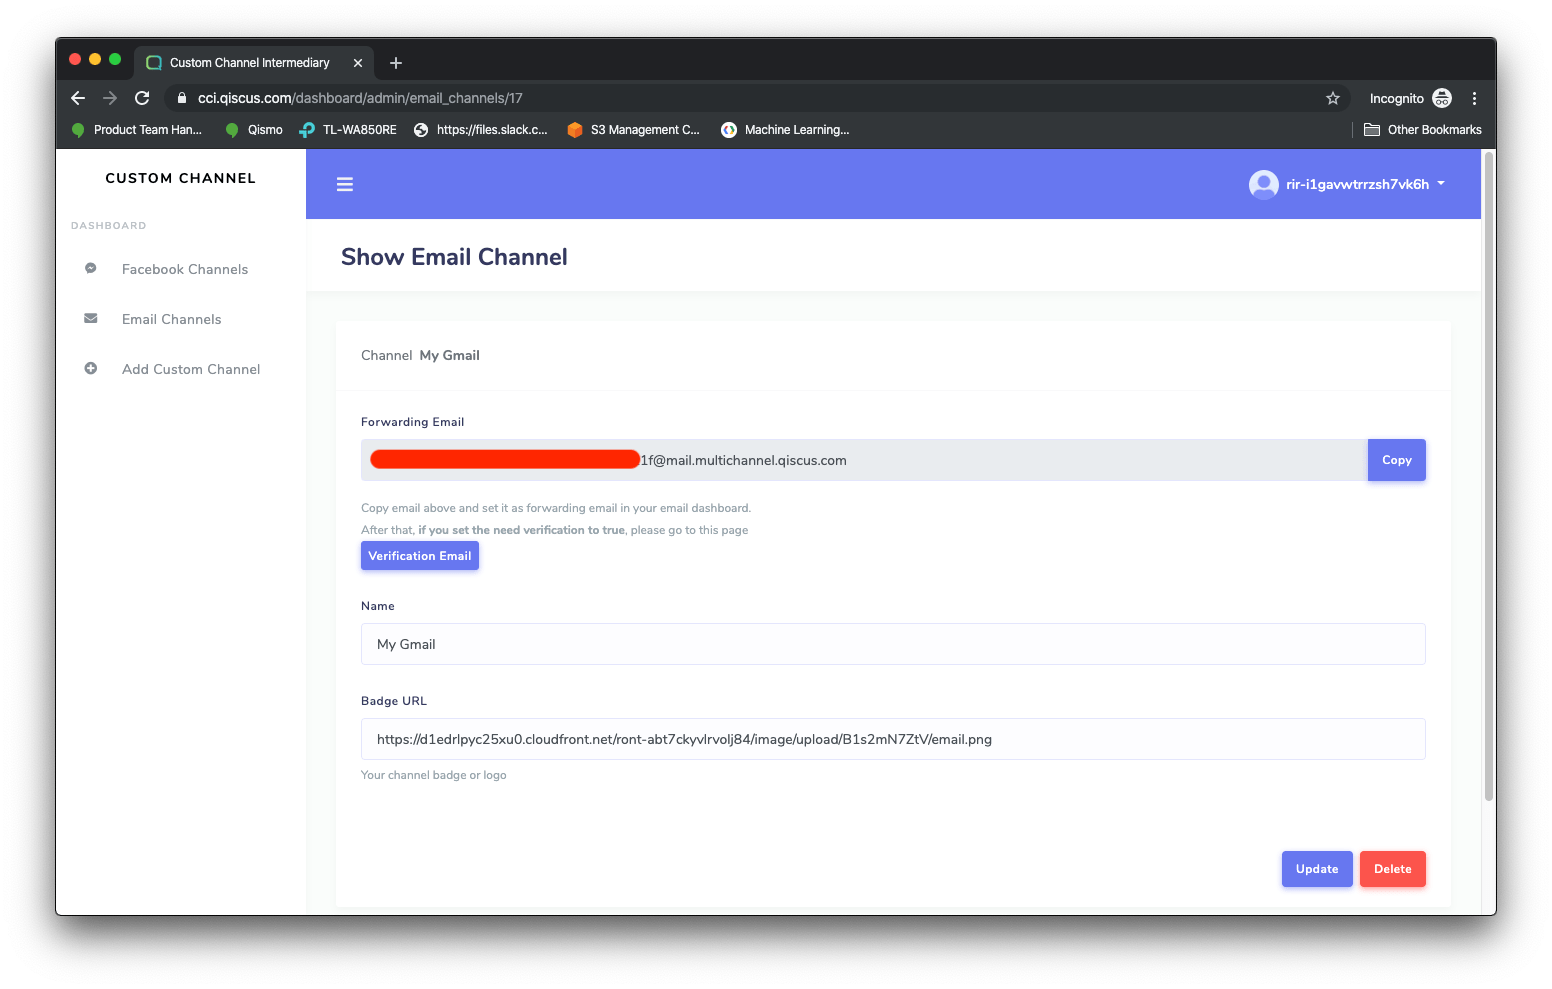
This will generate an email address for forwarding purposes and create a custom channel in Qiscus Multichannel automatically.
Keep the generated forwarding email address as this will be used in the forwarding setting under the email provider settings. The verification email button will be needed later when we configure the forwarding email under the email provider settings.
Email Forwarding Settings
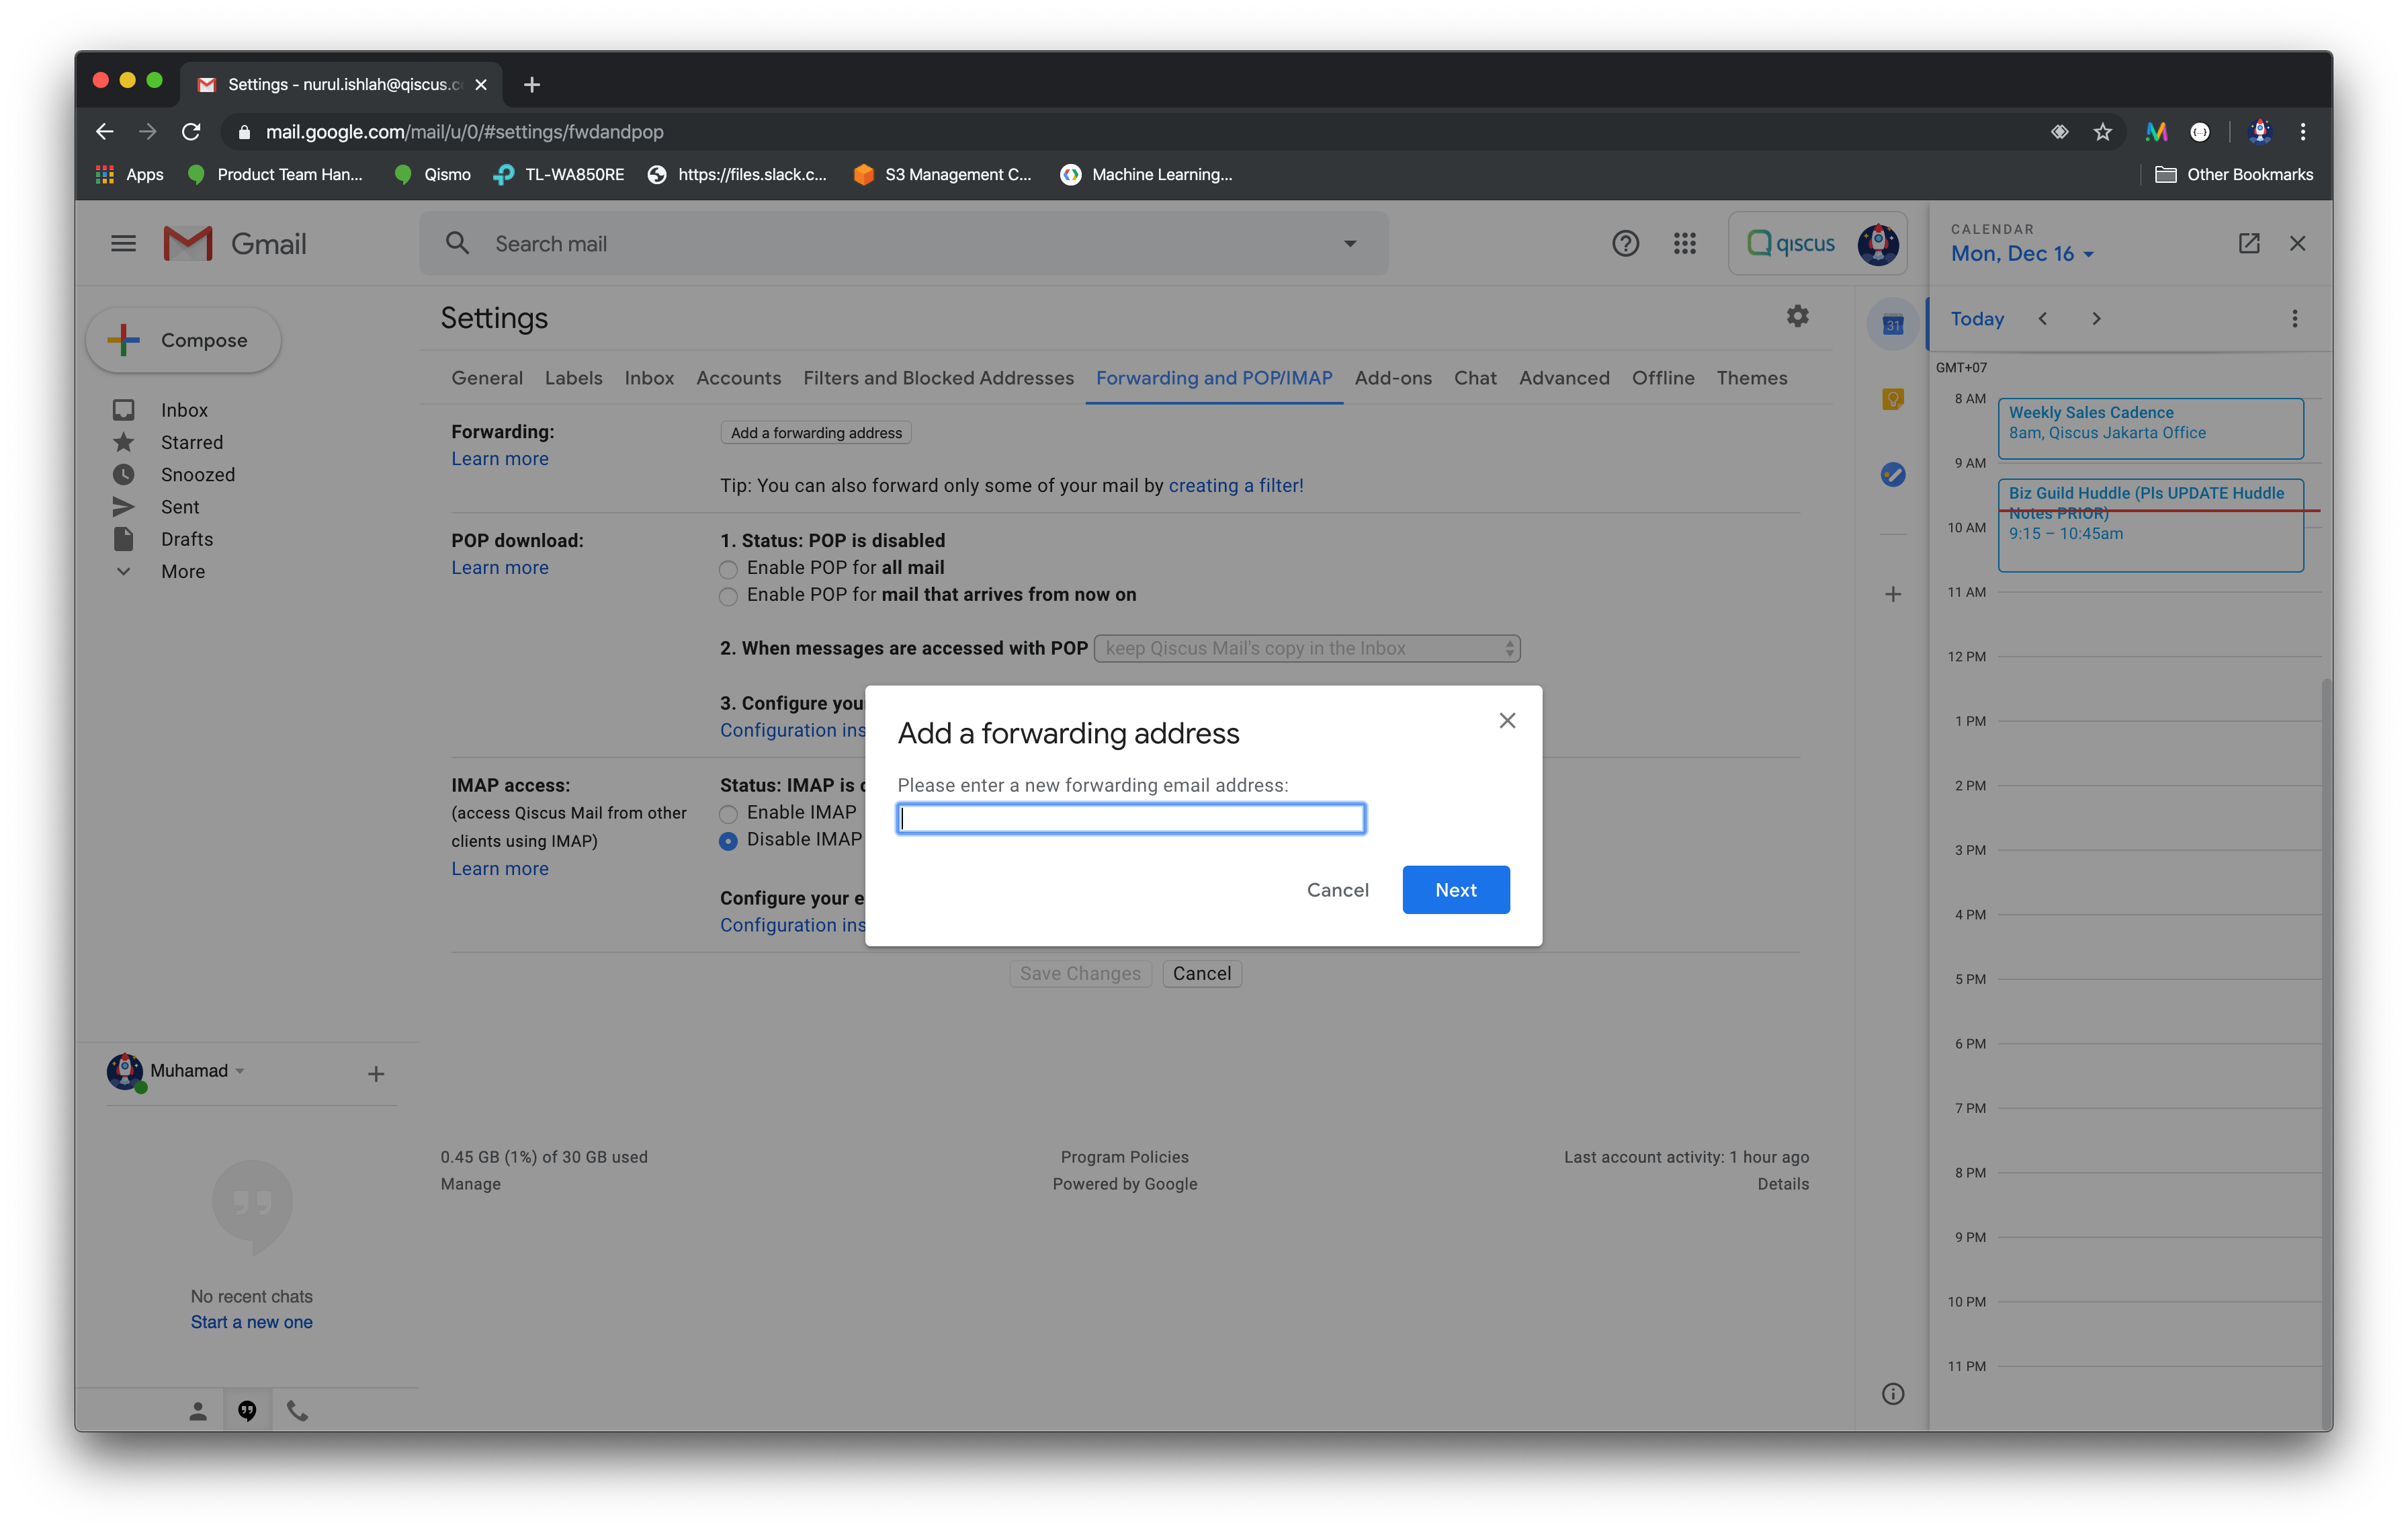
The next step is to configure our email forwarding settings. Here, we use the “[email protected]” address. Go to the Gmail dashboard and click Settings > Forwarding and POP/IMAP page. Then, click the “Add a forwarding address” and fill in the field with the generated email address we obtained from CCI. Click Next.
As soon as we have added the forwarding email address, Gmail will send a confirmation code to the said email address we’ve just added. You can check the code by clicking the “Verification Email” button at CCI.
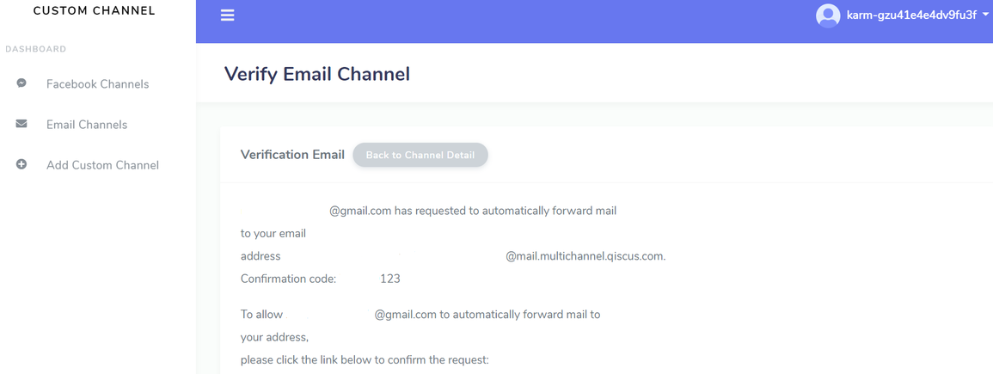
Copy the confirmation code and paste it into the confirmation code form at the Gmail Forwarding and POP/IMAP settings and click “Verify”.
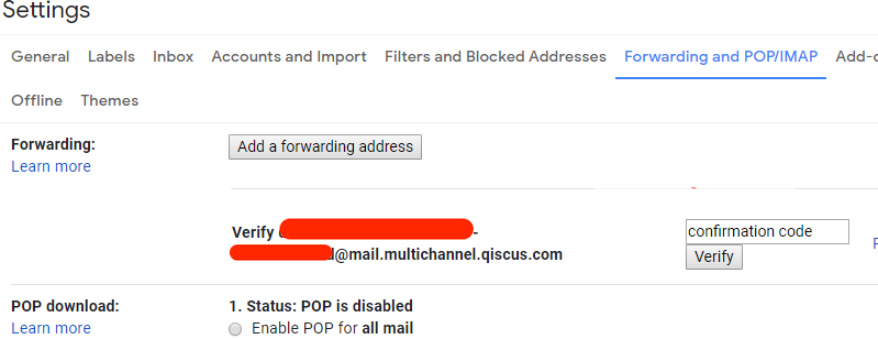
Don’t forget to save the configuration changes.
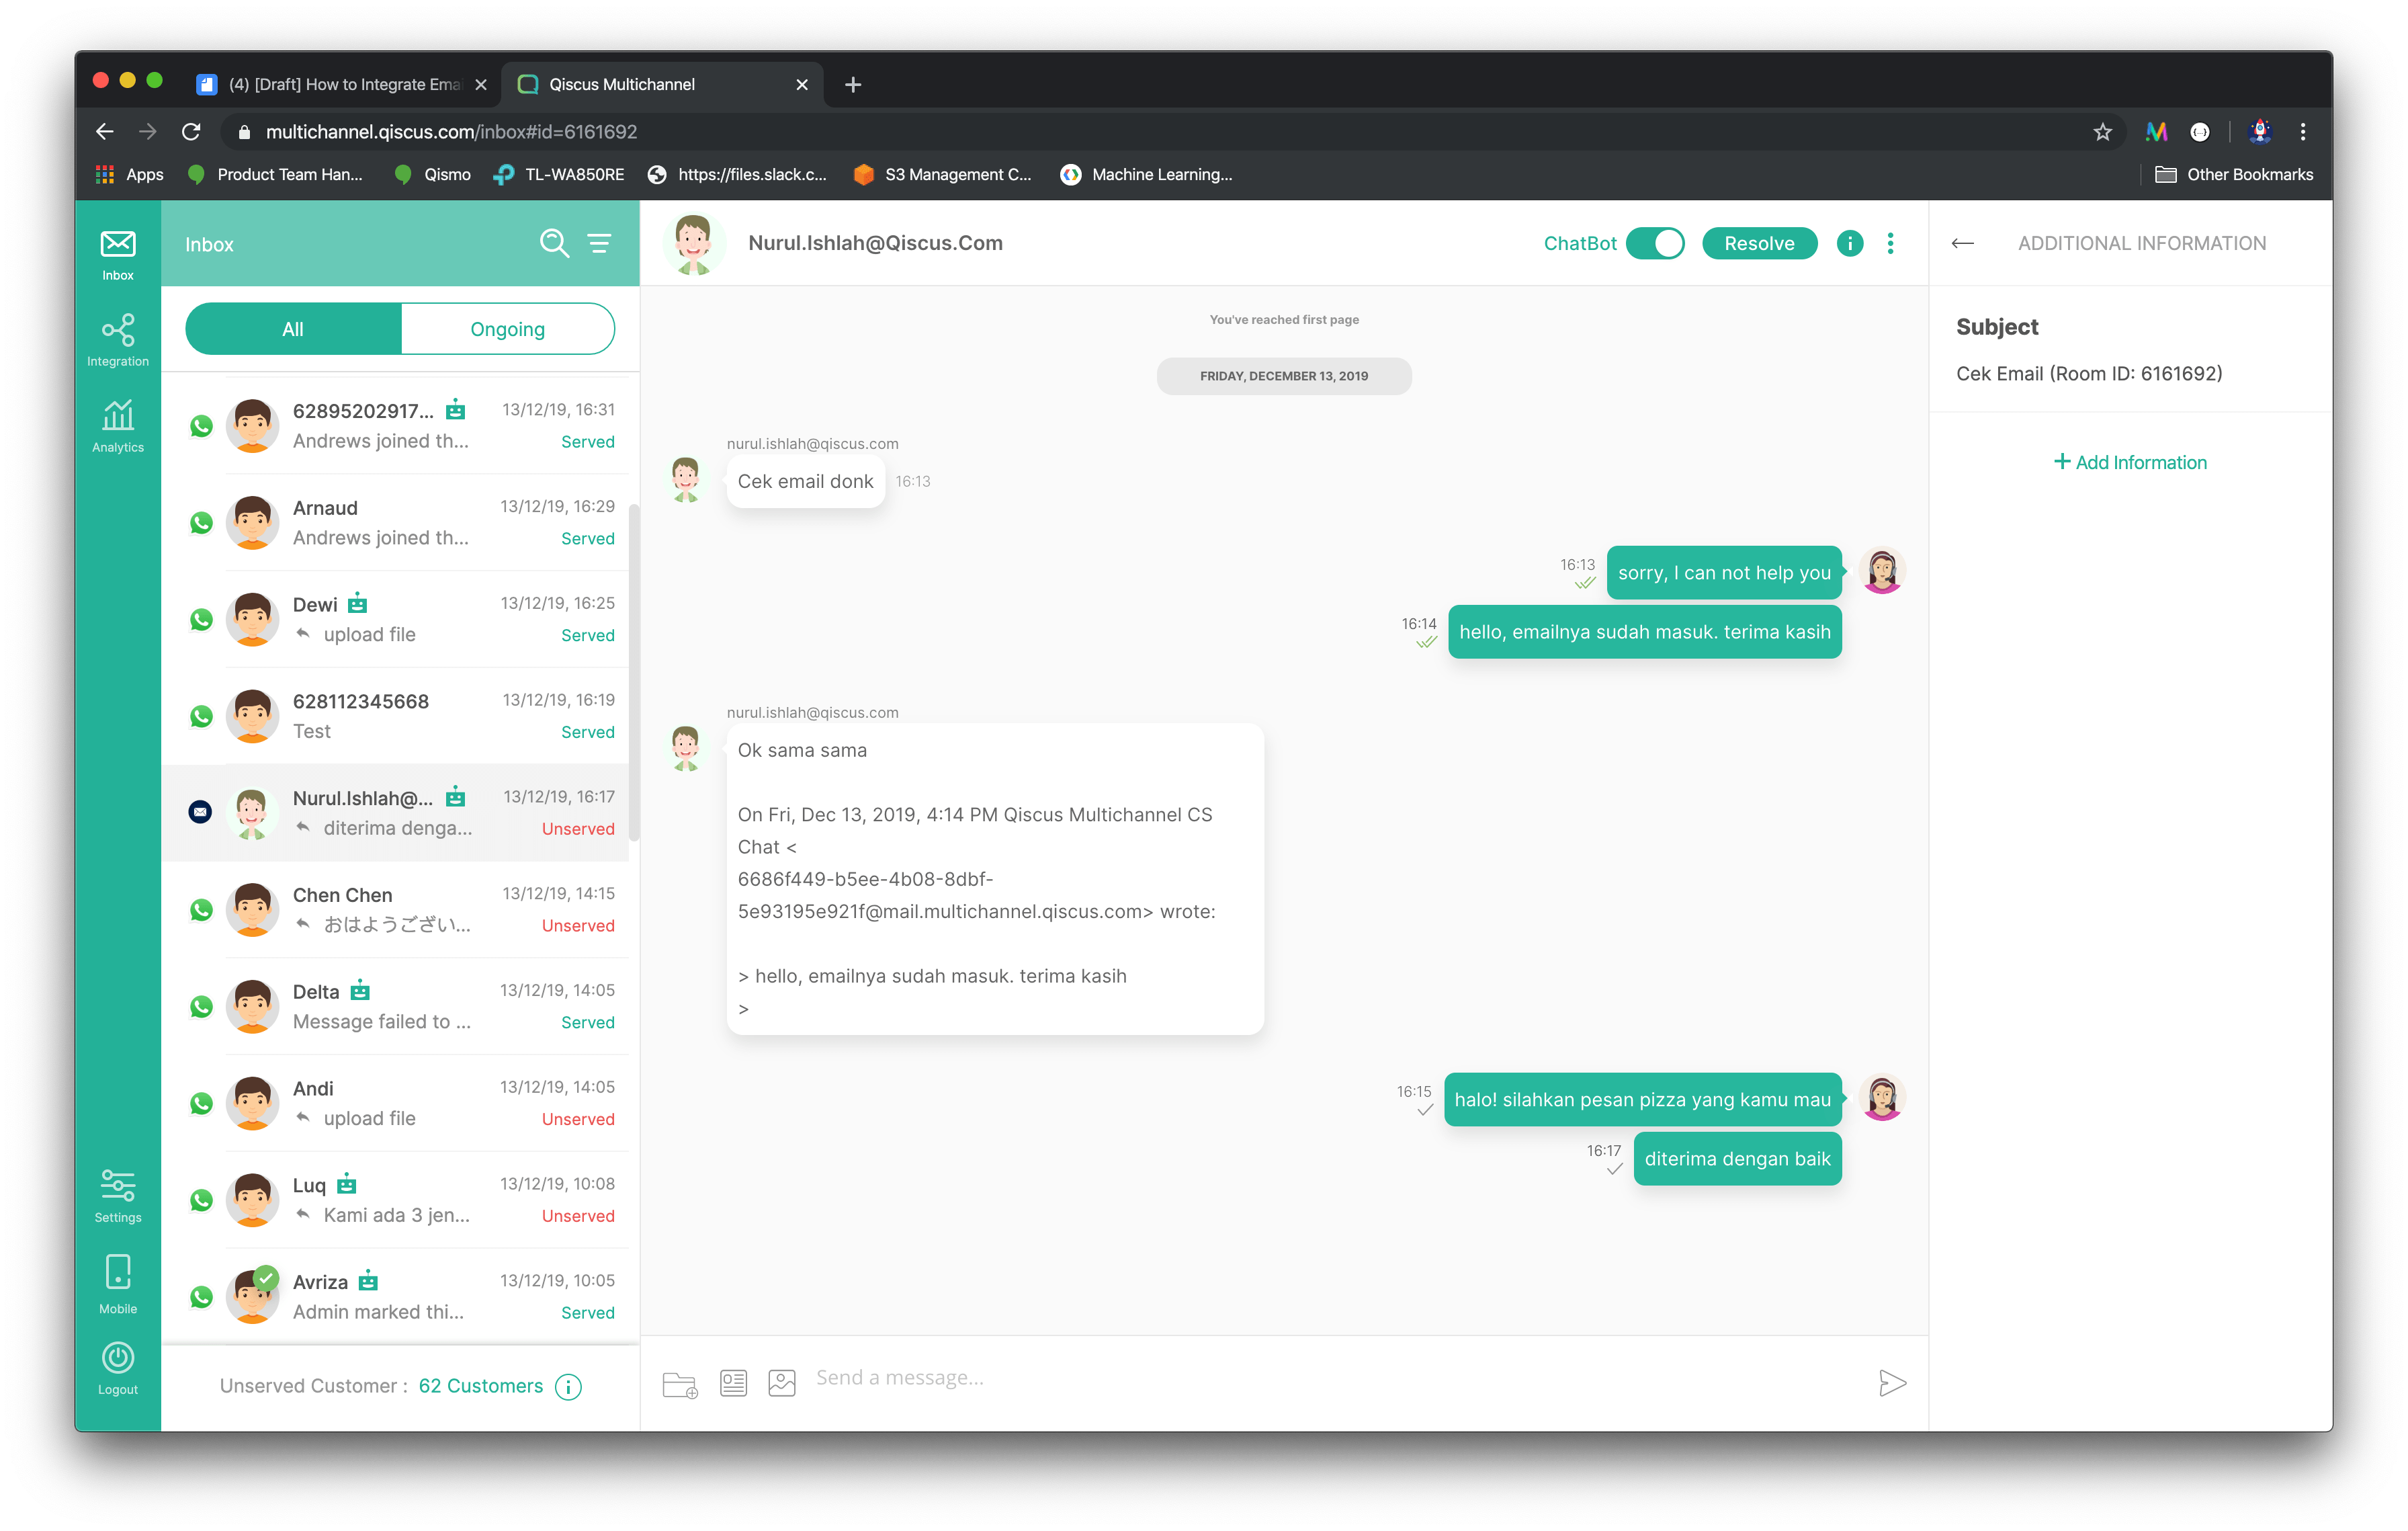
That’s all! Try to send an email to the address we have set up ([email protected]). If all is well, you will get an incoming email. Qiscus Multichannel will put the email subject in the additional information sidebar on the right side. You will then get the replies in your inbox.