Earlier on 2018, we announced our new customer service solution package called Qiscus Multichannel Customer Service Chat. We personally called it Multichannel CS Chat. It is an accelerator package as a solution for customers service. It is an integrated service which connects customers to merchants via currently available messaging services in the market such as FB Messenger, LINE, Telegram, Whatsapp, and Qiscus widget. This allows a merchant to gather all incoming messages from customers in one place and get back to them in no time.
Now, let’s say you already have an e-commerce website or any website that you want to make your users easier to get reach to you through your website and talk to you or your customer service. What do you need to do to use Multichannel CS Chat? In this article, we are going to share you how to set up this service. So, let’s get started!
Open up customer service package
Firstly, head to the Multichannel CS homepage and click the “Register” link to sign up. On that page, you will be asked to fill in several fields before signing up. You will then be brought to the login page to log onto the dashboard.
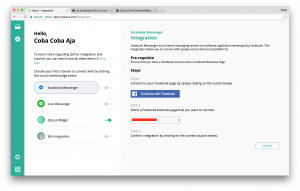
As soon as you logged in, you will be brought to the integration page. In this page, you can connect to our supported messaging service channels. At the moment we only support FB Messenger, LINE, Whatsapp, Telegram, and of course, our Qiscus widget. But fear not, we are expanding our service to other famous chat services as well, just you wait. Oh, didn’t I mentioned that you can integrate your chatbot as well? If not, then you know you can do it now.
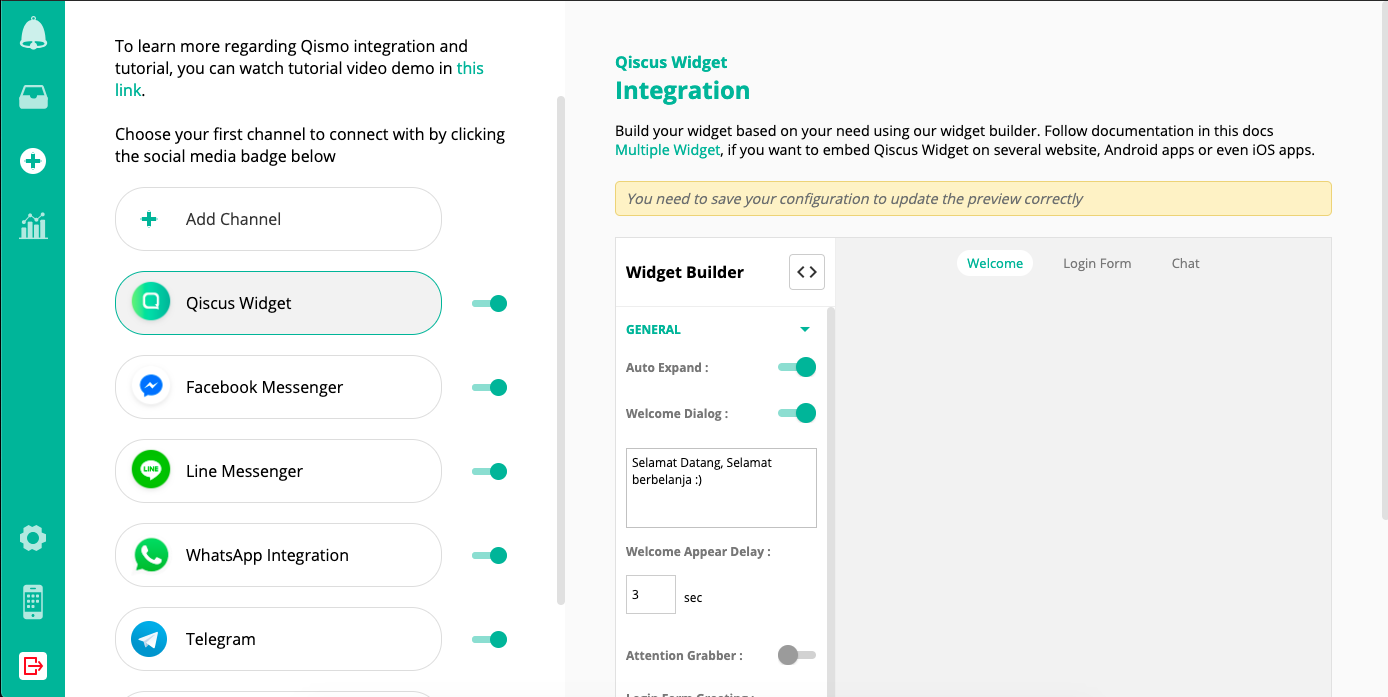
On that page (picture above), we have already provided several credentials which you usually need to use our widget. So you don’t need to do so anymore here. All you need to do now is to copy the code snippet provided in Step Three and paste it to your website.
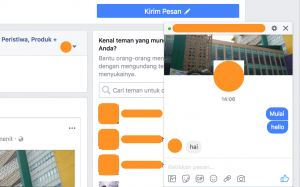
To make it simple, we will be using codepen for demonstration. You can find out more here. In that pen, we only copied and pasted the snippet provided above. Let’s try to have a conversation.
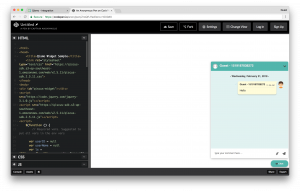
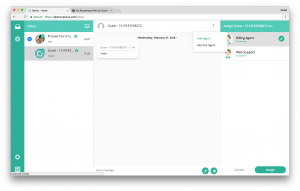
As soon as the user types in the message and press ‘Enter’, you, as an administrator) will receive the message in the dashboard as shown in the picture below.
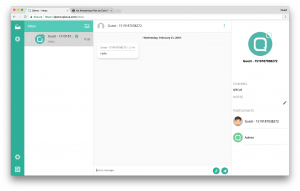
Then, you can continue the conversation there.
Users real name and email account
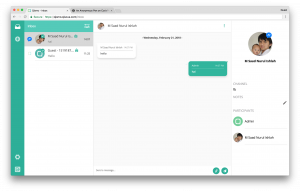
If you noticed in the example above, we used a randomly generated name and email for the user to start a conversation with your customer service team. But what if you wanted to make a user sign in before they have a word with your team? The answer is just customize it. You may want to check this pen on how to do so.

So the main idea from that pen is that we collect user emails and names from a simple form, and we use it to log in to Qiscus Software Development Kit (SDK). Also, for more information about our Qiscus SDK feature and customization, you can jump onto our documentation section. Please note that the example above is not using form validation. Do consider including the validation when you are using it on the production version.
What about Facebook Messenger and LINE?
The process is more or less the same. You can just follow the steps in the respective pages. You basically just need to provide some credentials and Multichannel CS Chat will handle the rest.
Facebook Messenger
For example, when you want to get any messages through your Facebook Page message in Multichannel CS Chat, you need to follow the steps and you will then be connected with Facebook Messenger.
LINE
On the other hand, for LINE, you need to do a bit extra work here. First of all, Multichannel CS Chat only supports messaging Application Programming Interface (API) that has the developer plan for now. So, please make sure you select the plan correctly.
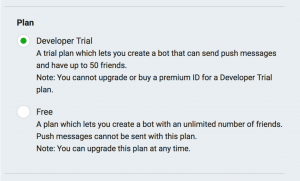
On the LINE console, you need to configure several things:
- Issue channel secret and save it for further use on Multichannel CS Chat settings,
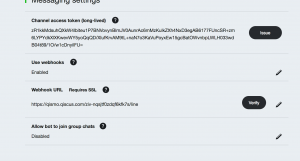
- Scroll to the messaging settings and issue your LINE app channel access token, and save this token
- Make sure to enable “use webhooks” field
- Make sure to also enable “allow bot to join group chats” field
- You may also want to disable auto-reply and greeting messages features
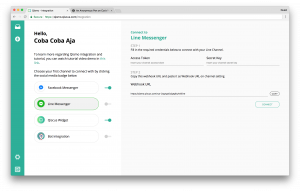
Then, proceed to Multichannel CS Chat integration page for LINE and fill in these two basic pieces of information we’ve gotten from the LINE console-Channel access token and channel secret.
- The next step is to copy the generated webhook URL
- For the last step, finish it with clicking the connect button.
Finally, return to the LINE console in picture.9 and paste the copied webhook URL to the Webhooks URL in the Messaging Settings section. Then verify it.
What to expect further?
So far you already know how to use Multichannel CS Chat basic feature, which is integrating all supported messaging platforms into one place and has the ability to enable merchants to respond to incoming messages from one place as well. As you might guess, this is not the only feature Multichannel CS Chat has. While several features are in active development, Multichannel CS Chat already provides several other features that will empower you to engage more with your customers, such as:
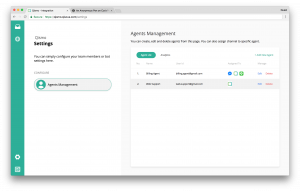
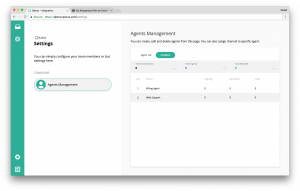
1. Agent Management System
As Customer Services (CS) departments may sometimes require more than two people to handle incoming inquiries, a management system is necessary. This issue can be solved by Multichannel CS Chat. How does it work? A merchant can add as many CS agents as they want to handle incoming enquiries. These incoming enquiries will then be assigned automatically and evenly to available agents. An admin can also manually assign any incoming inquiries to a selected agent if they want to do so. In addition to that, a merchant admin is able to view agent statistics in handling enquiries, too. All these come handy in one page with no hassle.
2. Messages List Filter

Chatbot
As I mentioned earlier in this article, Multichannel CS Chat also supports chatbot integration. This bot integration will be able to minimize the need of human customer service. While sometimes bot is not necessarily able to handle all inquiries, it can hand over the task to available human customer service for specific intent. However, since this topic worth another long article, we will cover it in next release. So, please stay tuned!